On this page
Organization settings & plan
Everything about your organization lives on one page: name, plan, WhatsApp connection, and reminders.
Open Organization in the sidebar at any time to review or change these four things:
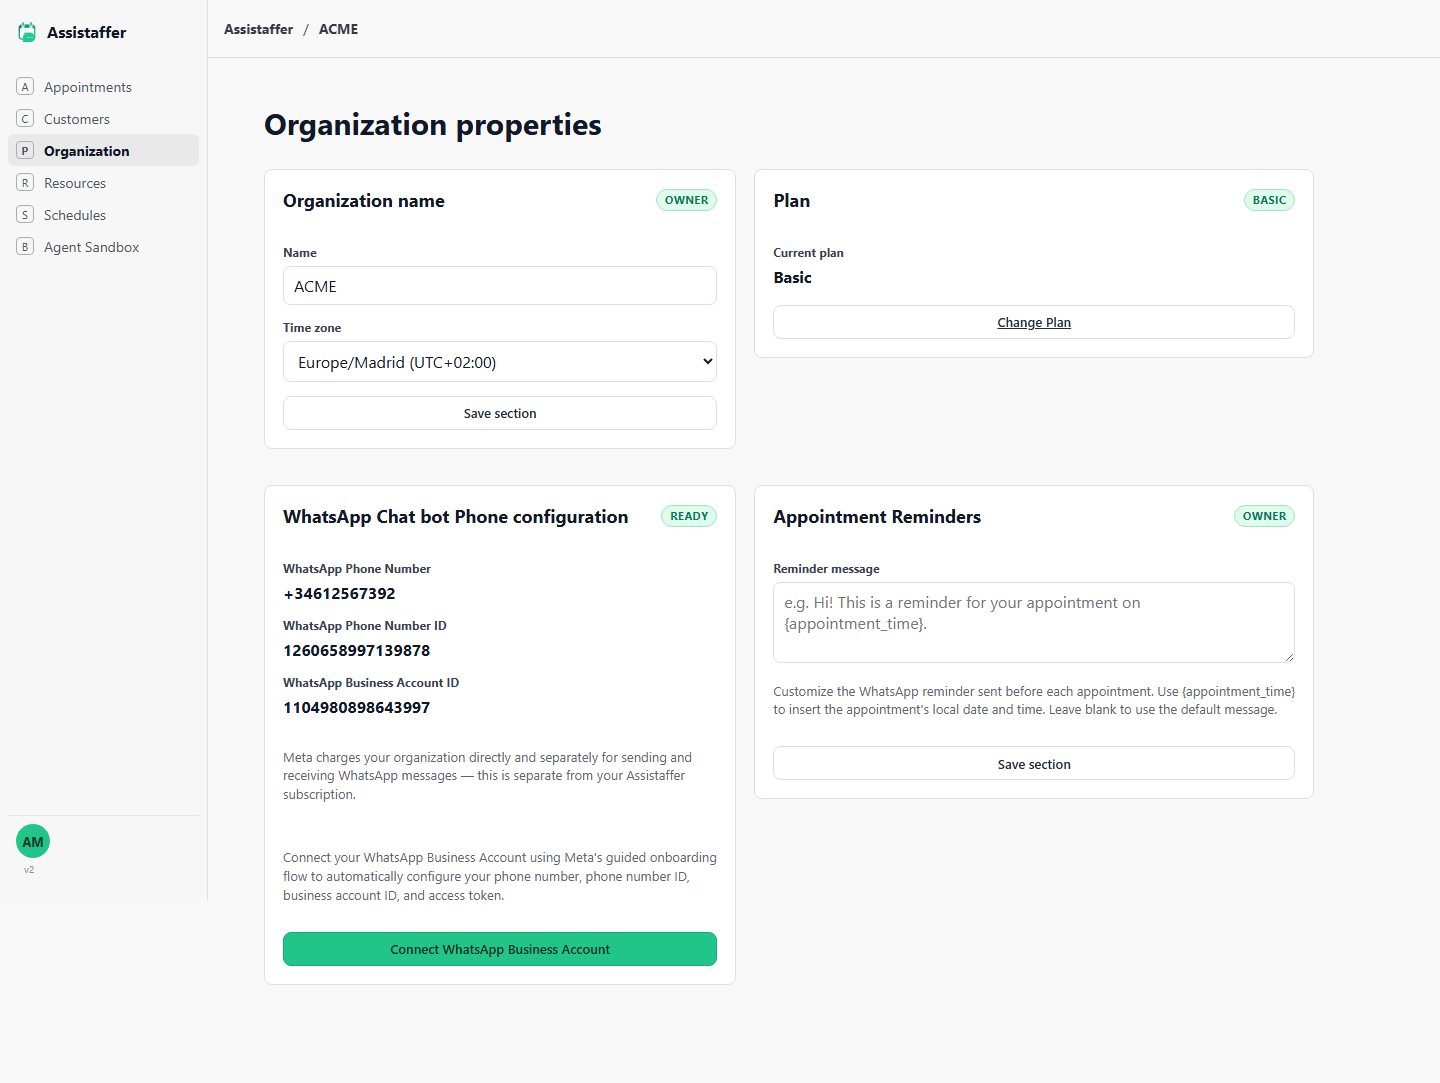
Organization properties
Organization name — rename your business or change its time zone; new schedules and appointments use this time zone by default.
Plan — shows your current plan (Basic or Premium here). Click Change Plan to upgrade, downgrade, or review resource and AI conversation limits at any time — you don't need to cancel first.
WhatsApp Chat bot Phone configuration — once connected, this shows your WhatsApp phone number, phone number ID, and business account ID. If you skipped WhatsApp during setup, the same Connect WhatsApp Business Account button appears here.
Appointment Reminders — customize the WhatsApp message sent before each appointment. Use {appointment_time} in the text and it's replaced with the customer's local appointment time; leave it blank to use the default message.
Weekly schedules
A schedule is a reusable set of weekly opening hours that any resource can follow.
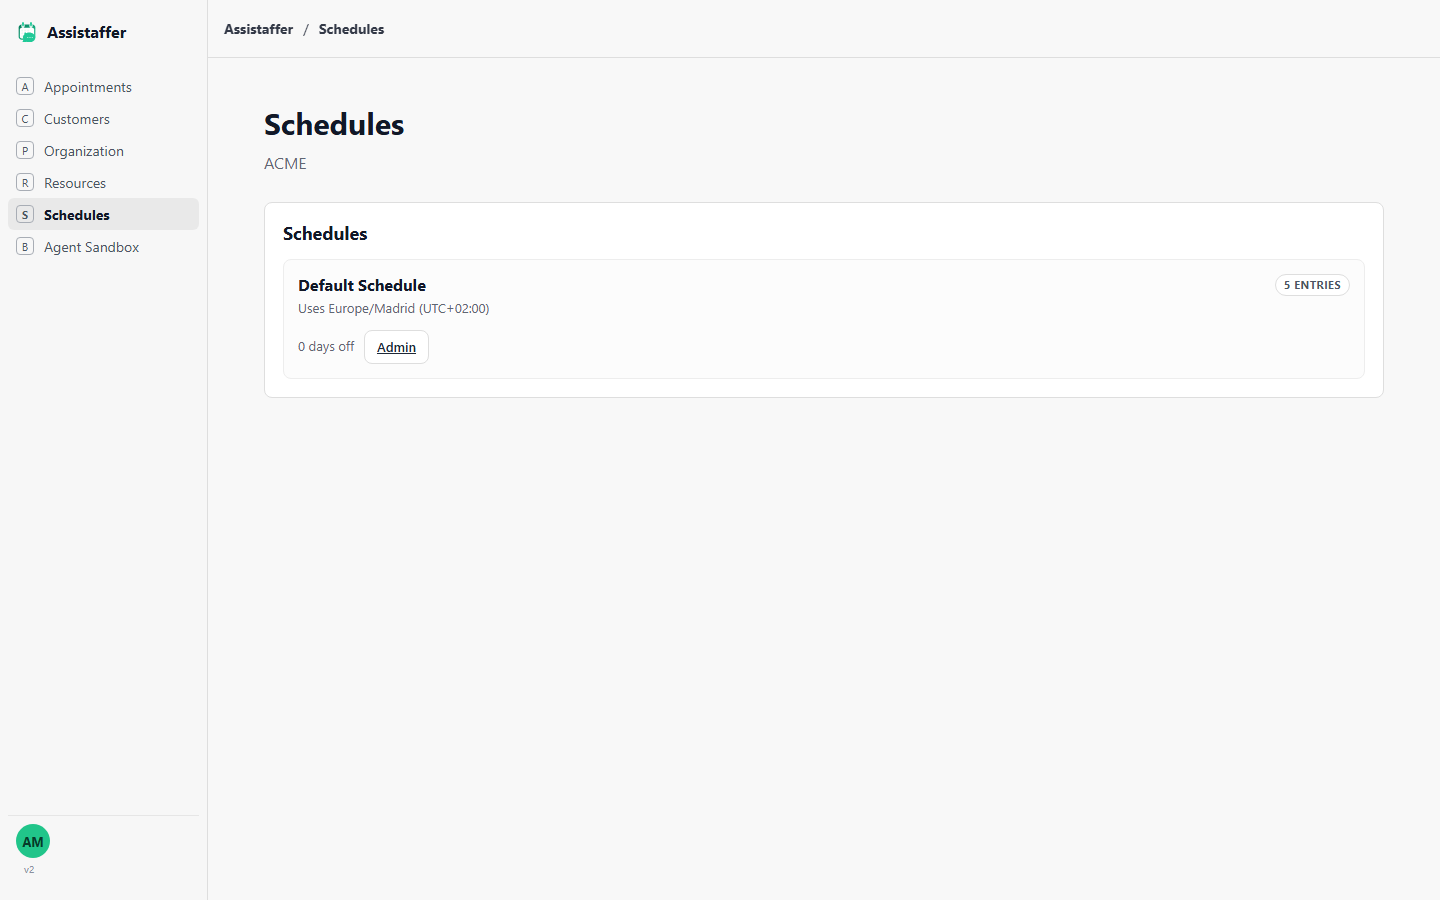
All your schedules in one place
Every organization starts with a Default Schedule. Create more when different resources need different hours — for example, a weekday-only schedule and a weekend-only schedule — then assign each resource the one it should follow.
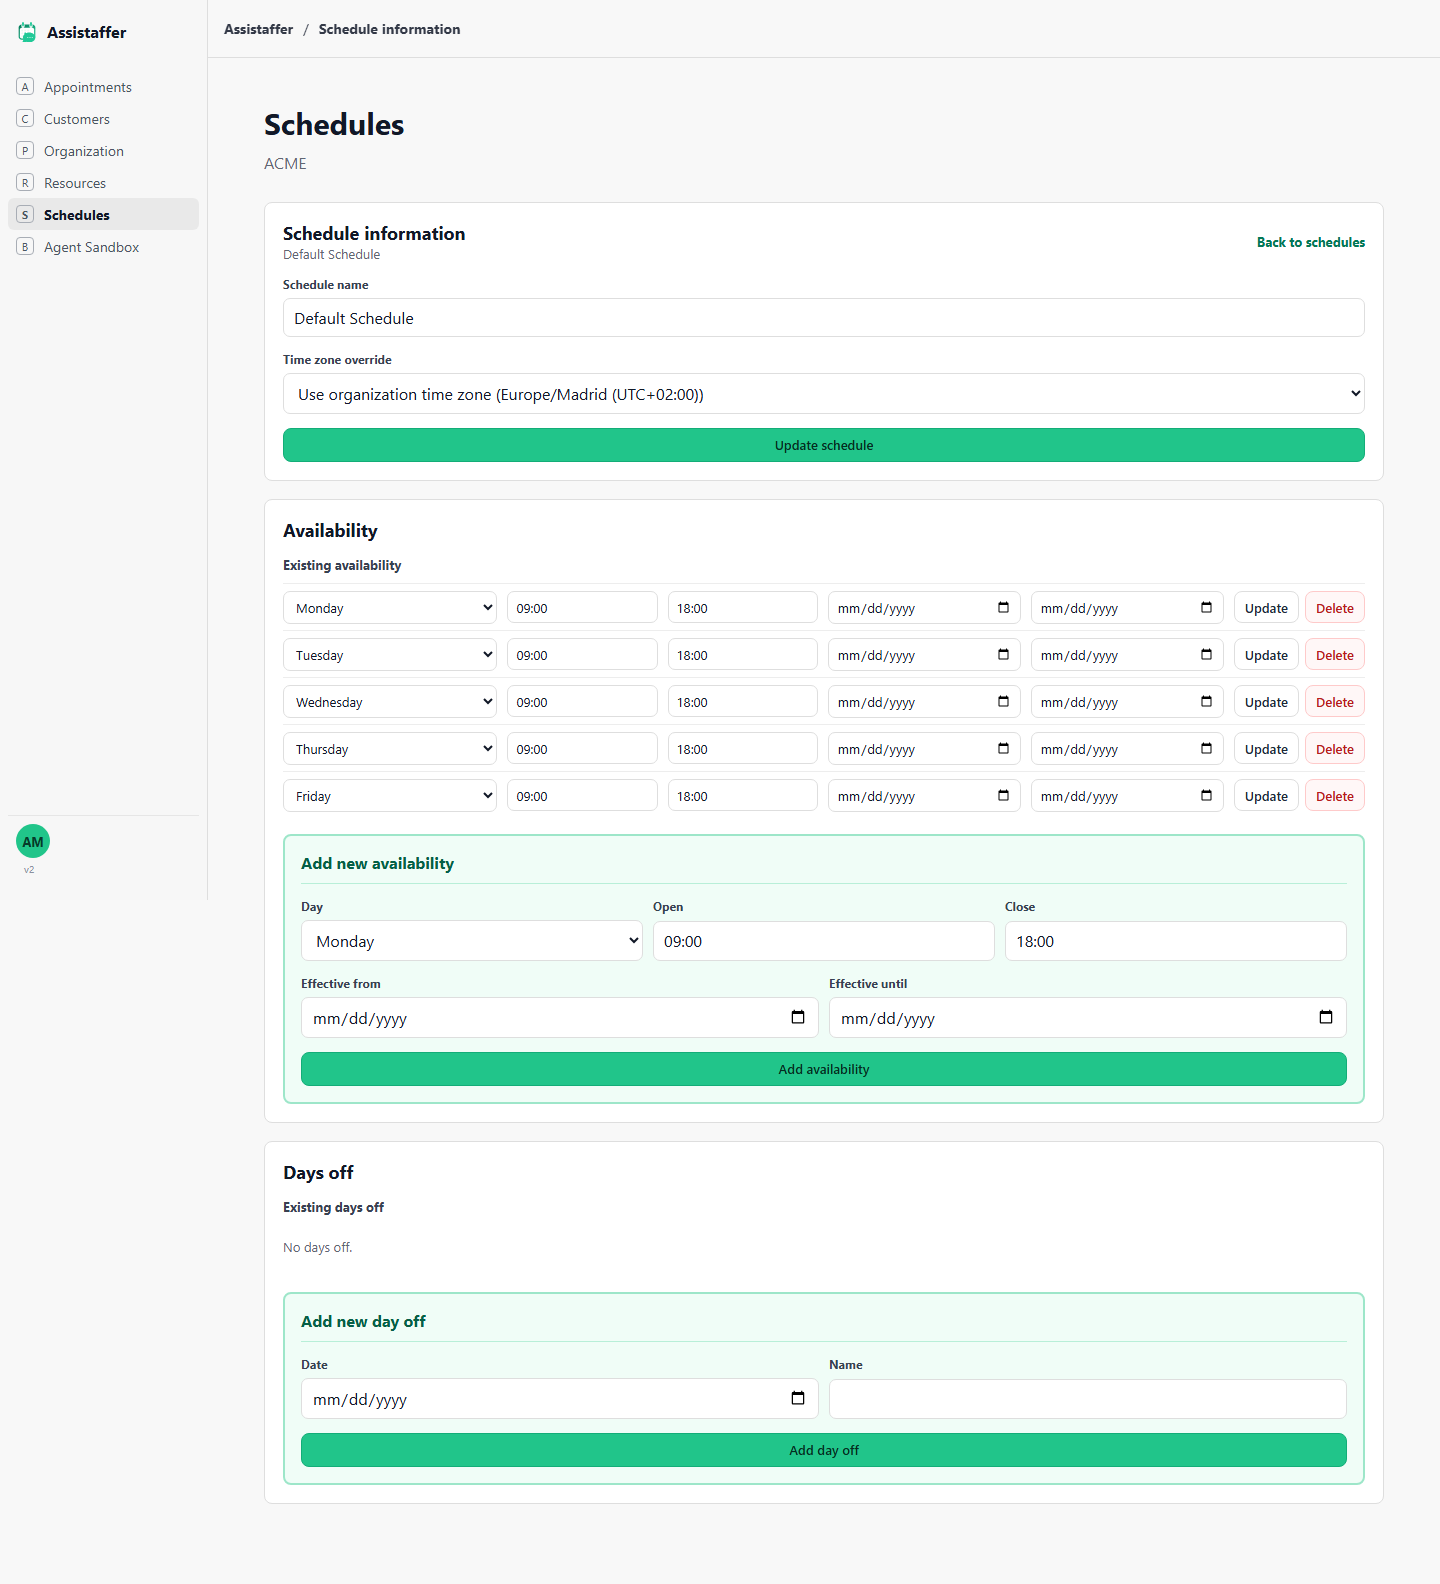
Availability and days off
Click Admin on any schedule to edit its name, override its time zone, and manage Availability — the opening and closing time for each weekday, optionally limited to a date range with Effective from / Effective until.
Use Days off to block a specific date entirely — holidays, closures, or vacation days — across every resource that uses this schedule.
Resources
A resource is anything customers book — a room, table, chair, or staff member.
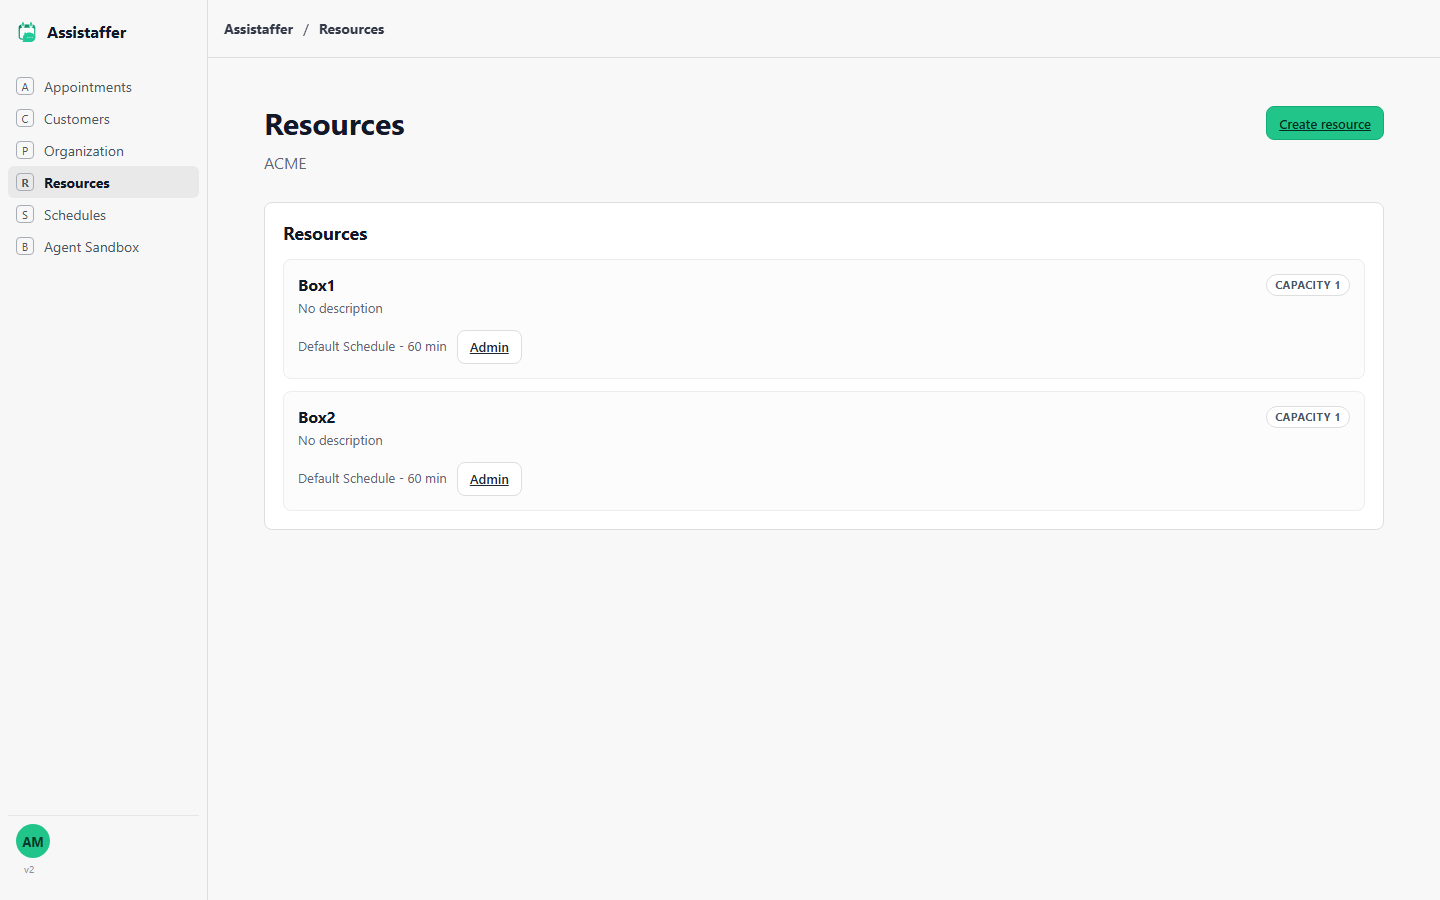
Everything customers can book
Each resource shows its capacity, the schedule it follows, and its slot duration at a glance. Capacity is how many people or units it serves — useful for a restaurant with a table for 2 and a table for 8, each set up as its own resource. Click Create resource to add a new one, or Admin to edit an existing one.
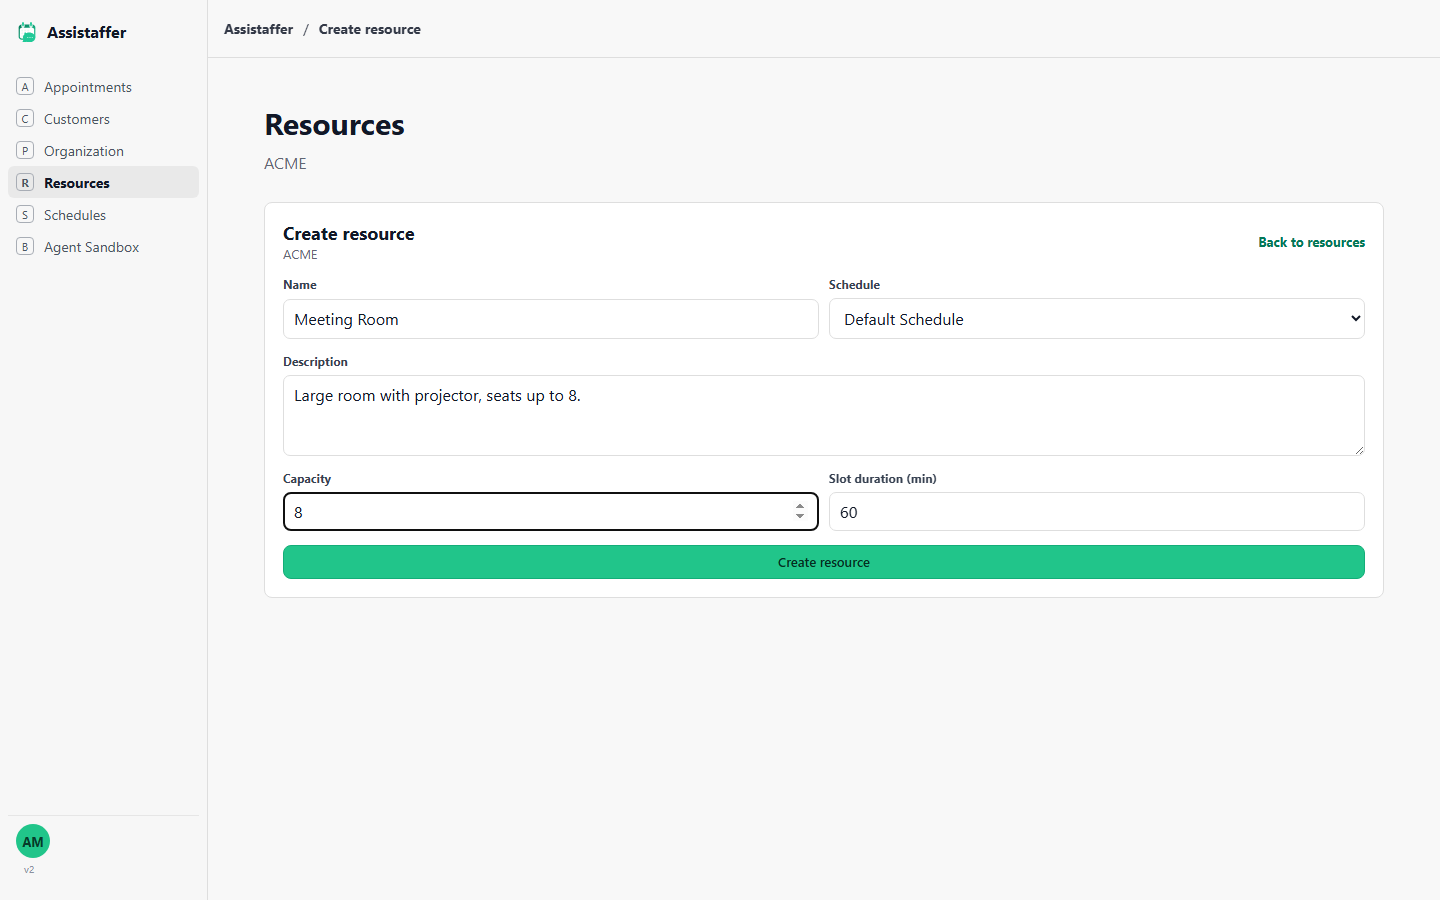
Name, schedule, capacity, slot duration
Schedule determines when this resource can be booked. Capacity is how many people or units this resource serves — set it to 1 for something used by one customer at a time, like a consultation room, or higher for a group-sized resource, like a restaurant table for 8. Slot duration sets how long each booking block is, in minutes.
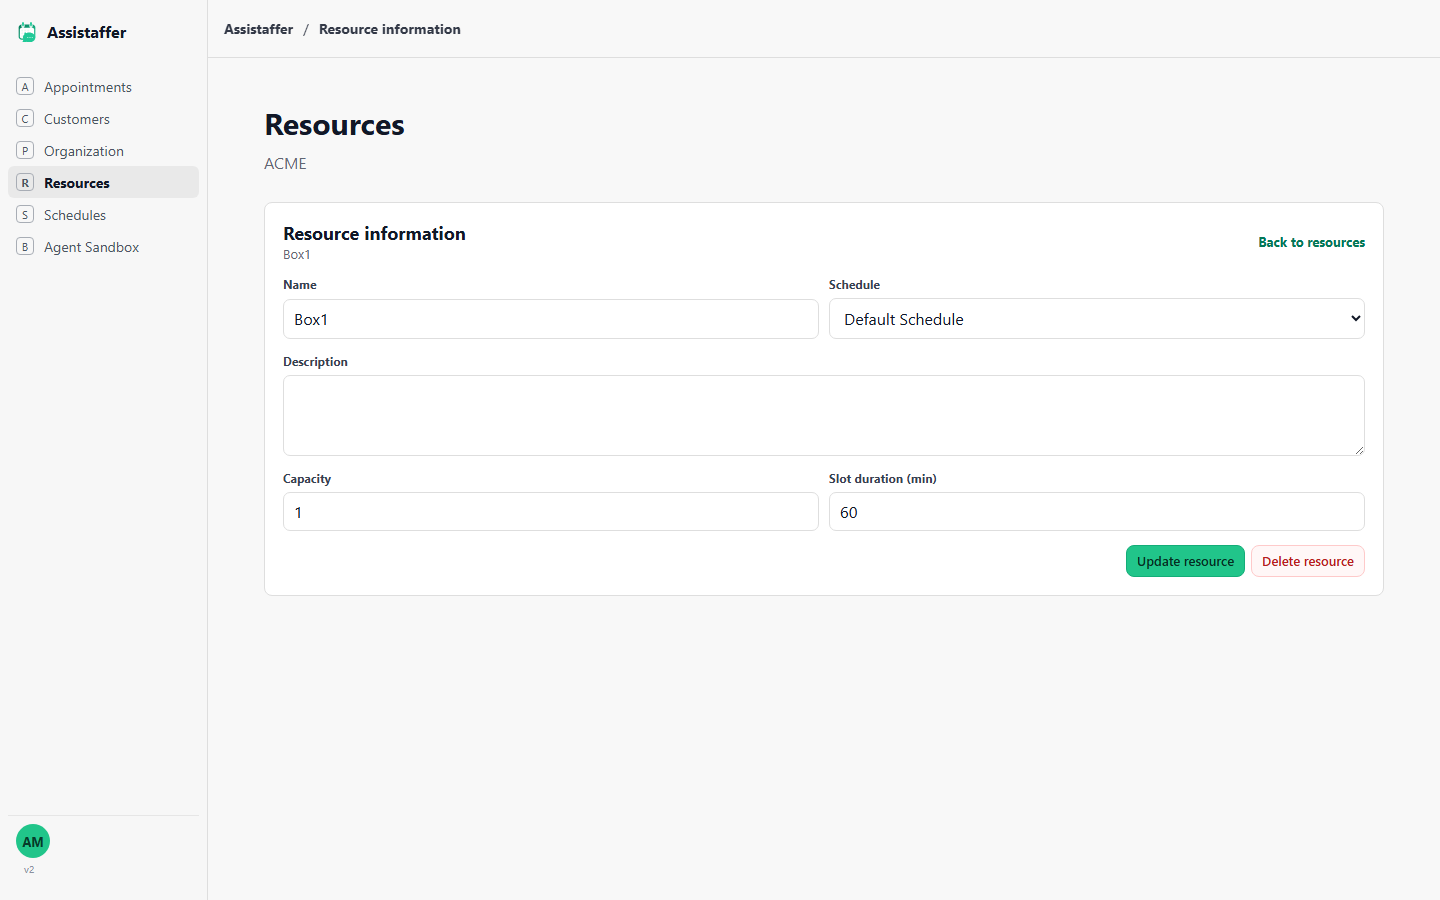
Editing or removing a resource
Change any field and click Update resource, or use Delete resource to remove it entirely — customers and the WhatsApp AI Agent will no longer be able to book it.
Appointments
The resource calendar shows every free and reserved slot, and lets you book manually.
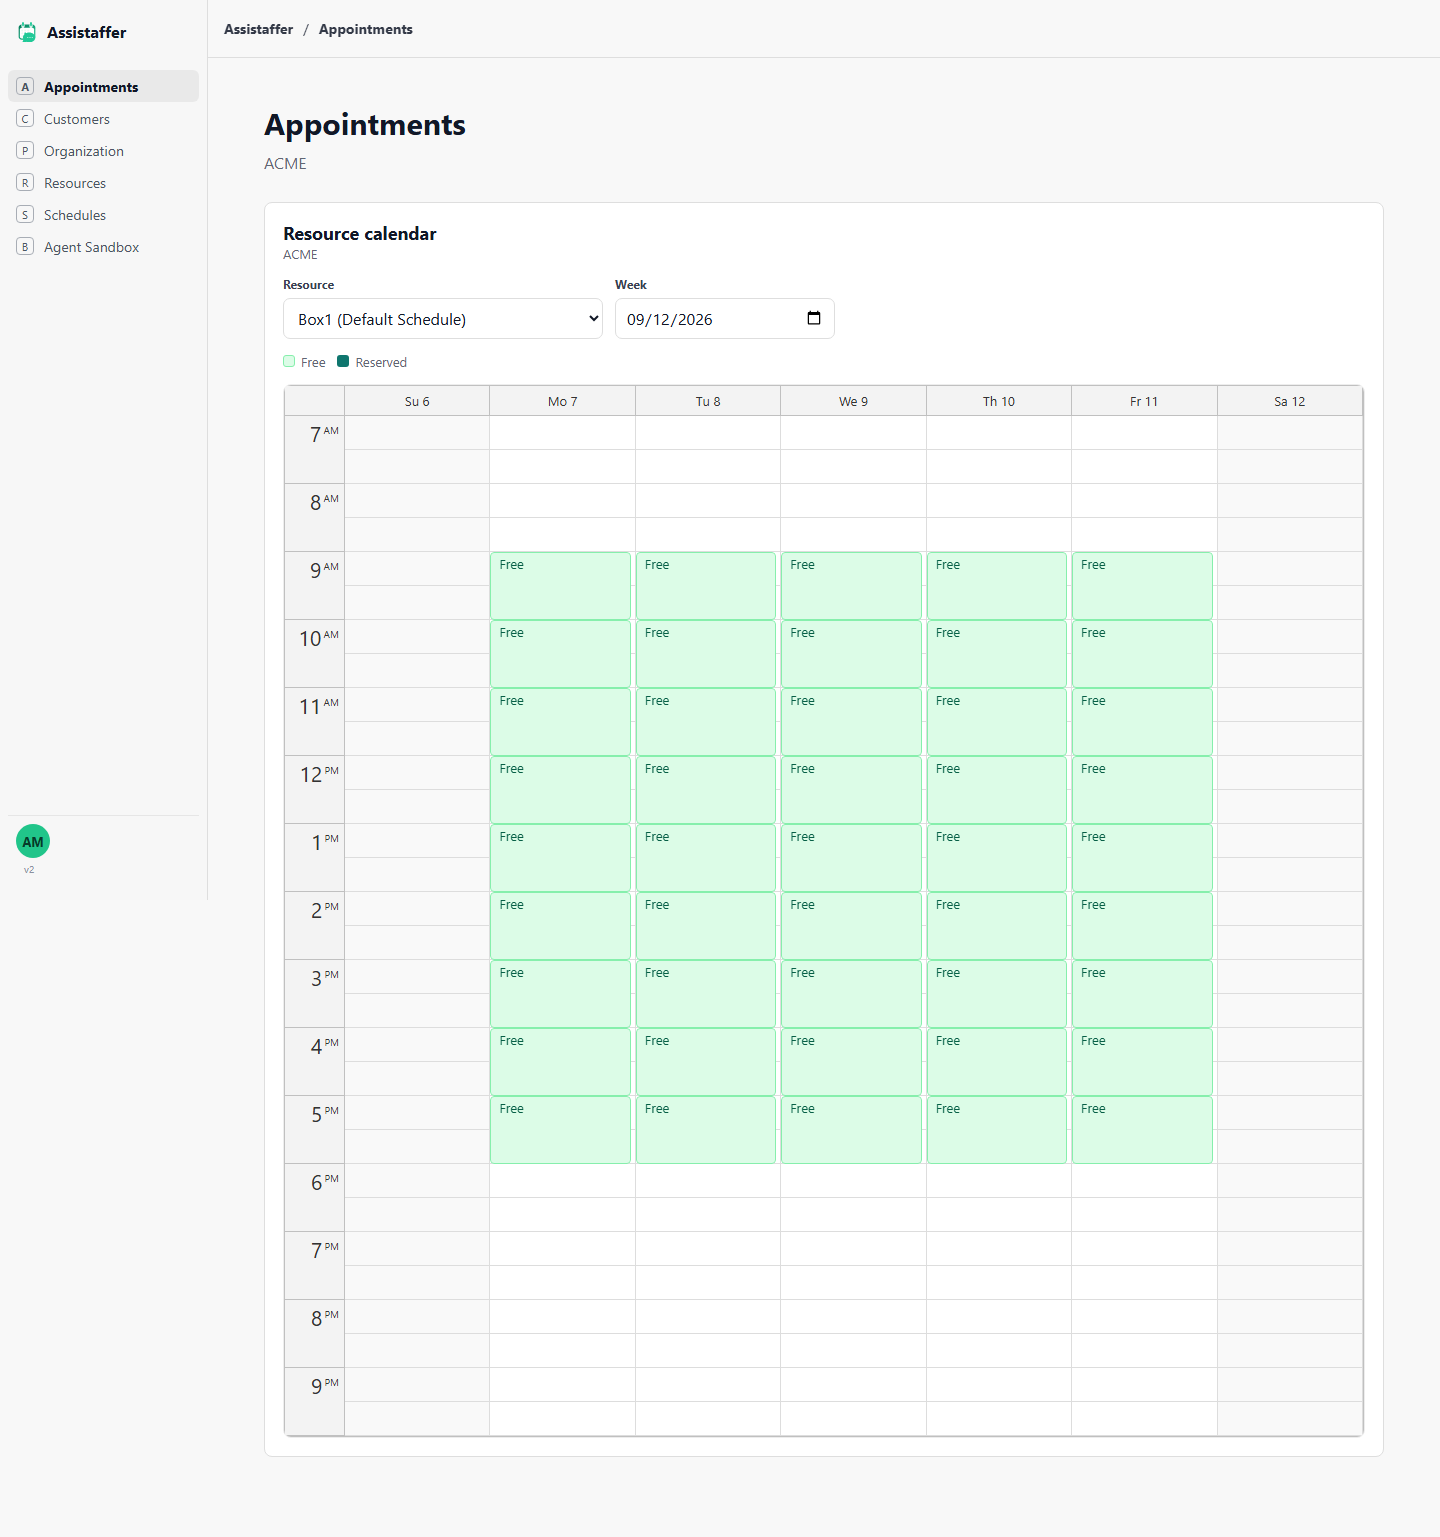
Free and reserved slots, by resource and week
Pick a resource and a week to see its calendar. Free slots (light green) are open for booking; Reserved slots (dark green) show the customer's name. Most bookings arrive automatically through the WhatsApp AI Agent, but you can create or manage them manually here too.
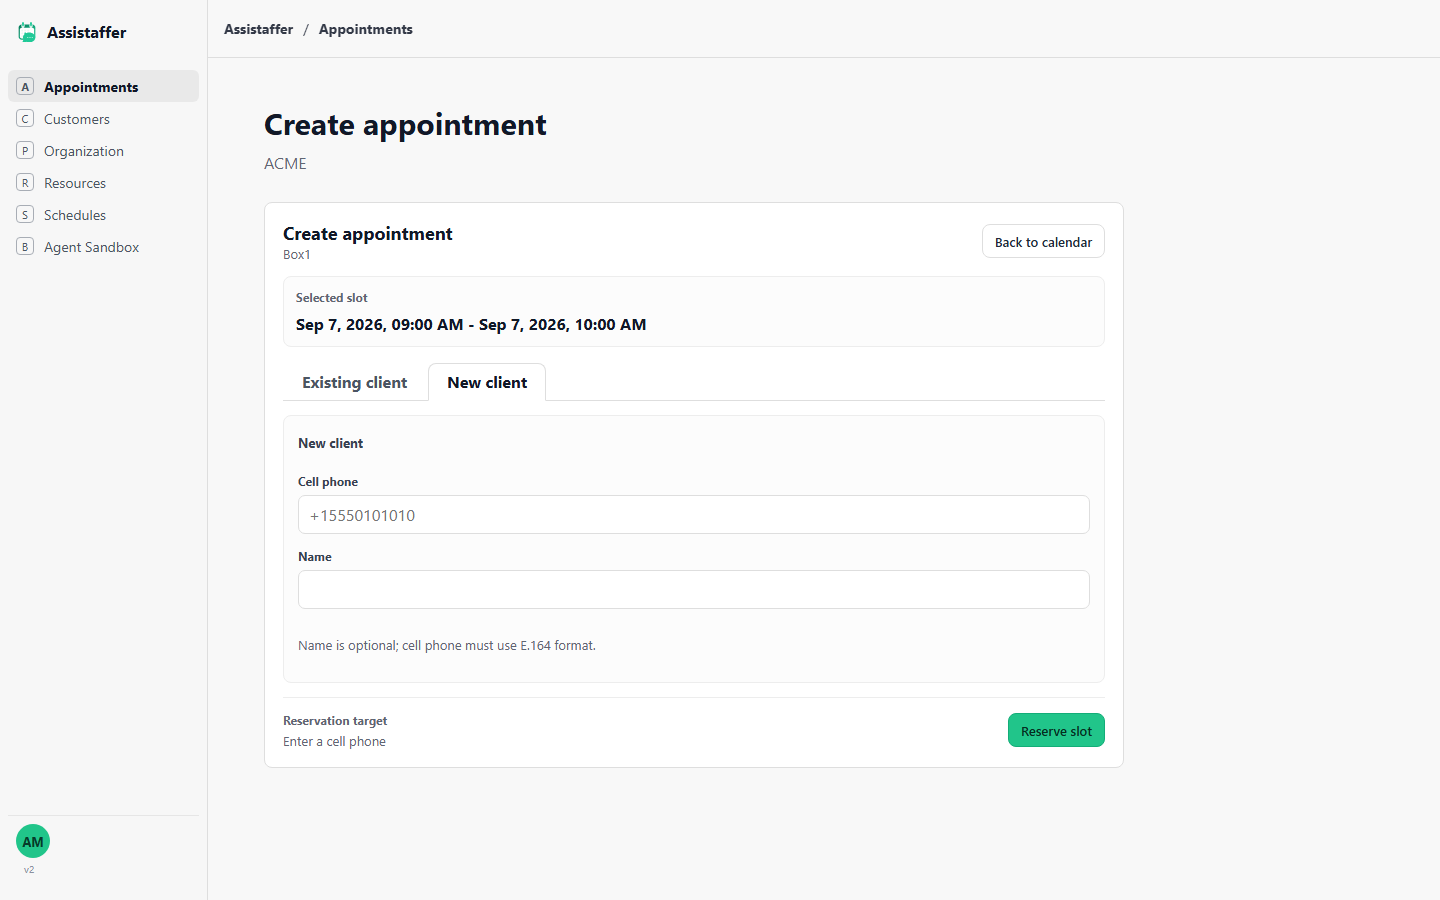
Click any free slot to book it
Choose Existing client to search by phone or name, or New client to create one on the spot with just a cell phone (name is optional). Click Reserve slot to confirm.
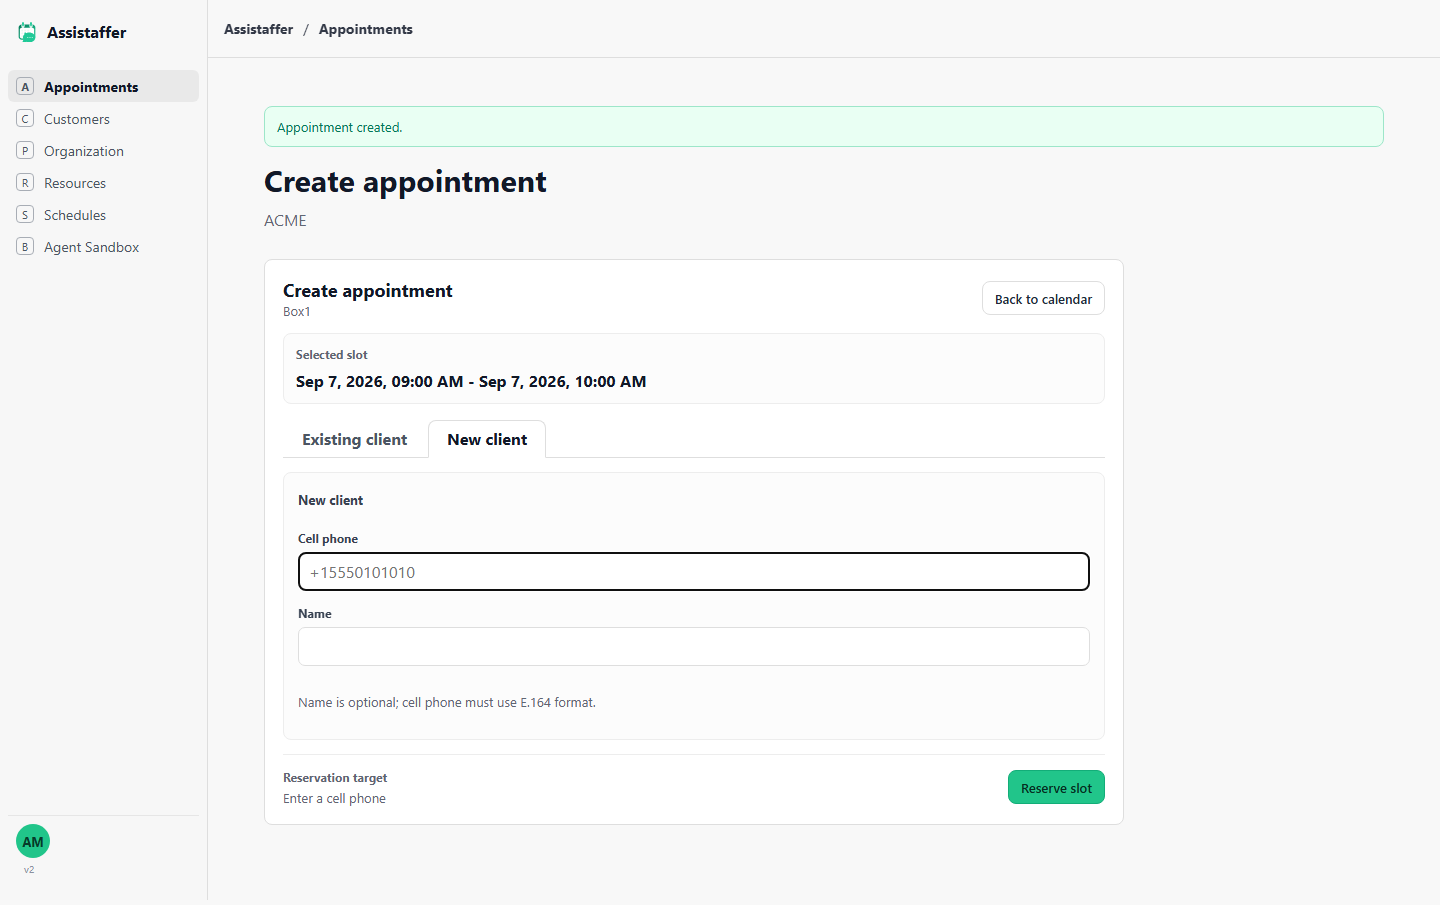
Appointment created
A confirmation banner appears and the slot turns into a reserved appointment on the calendar, labeled with the customer's name.
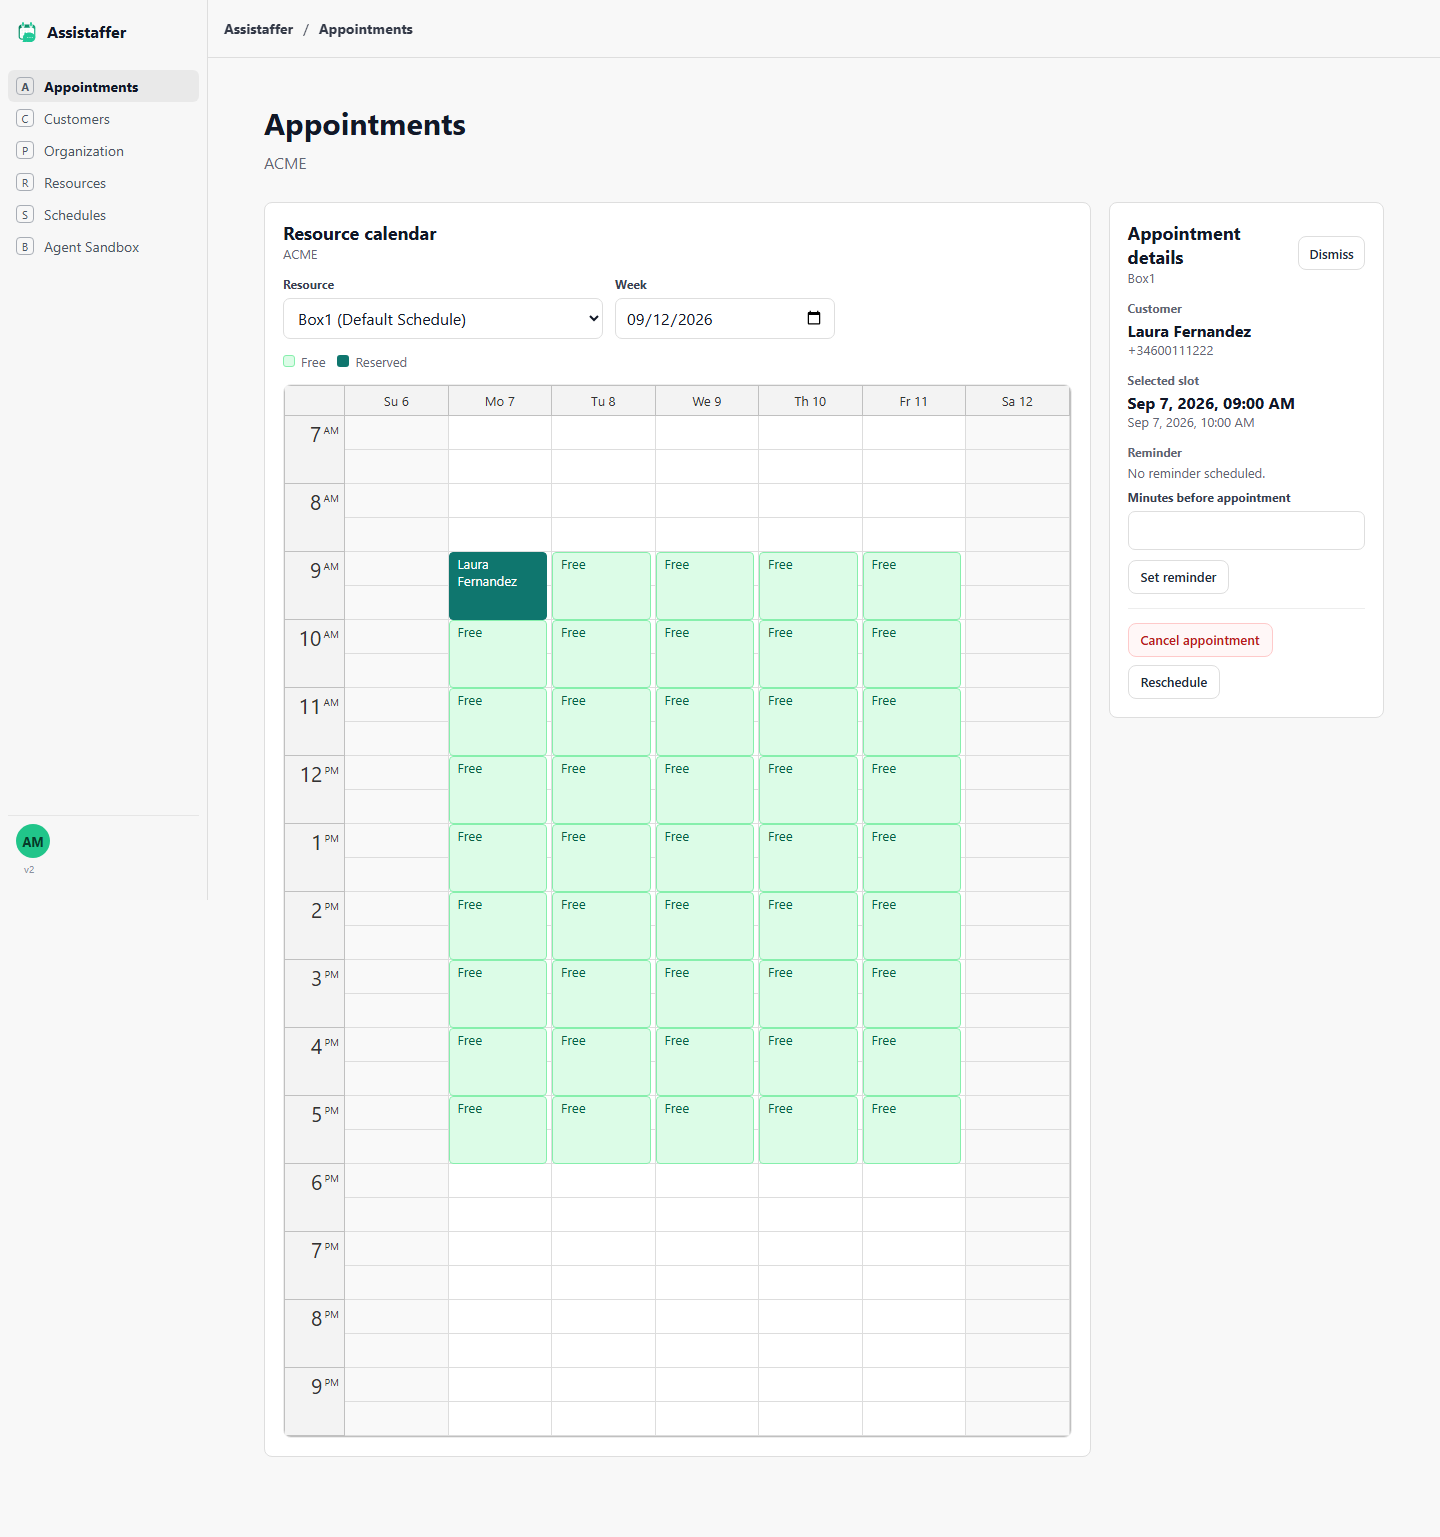
Click a reserved slot to manage it
The details panel shows the customer and time, lets you set a one-off reminder a chosen number of minutes before the appointment, and gives you Cancel appointment and Reschedule actions.
Customers
Every customer who books — by WhatsApp or manually — has a profile here.
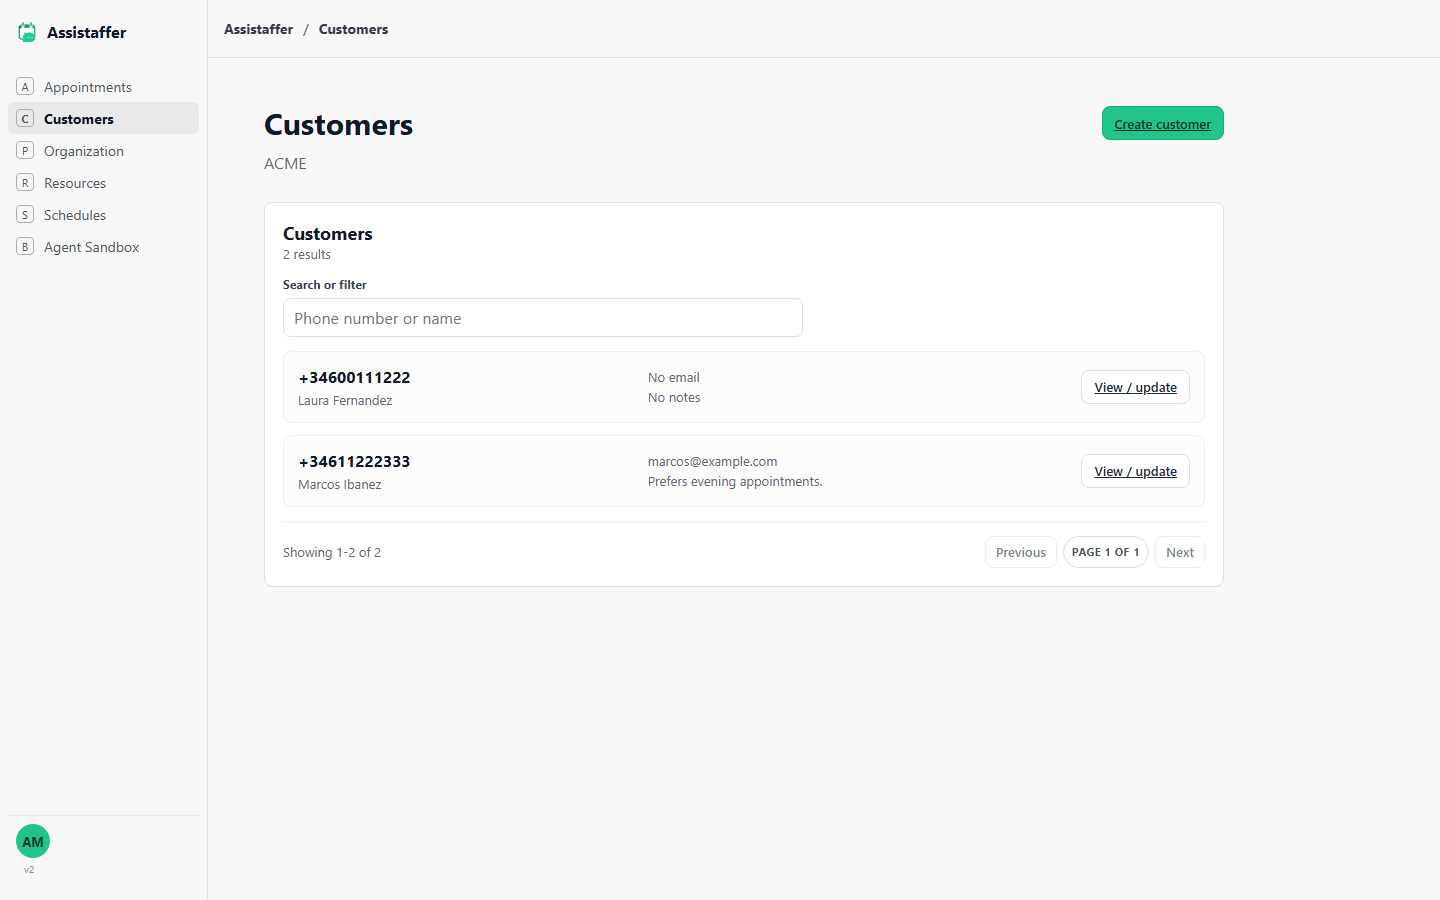
Search, filter, and create customers
Search by phone number or name, or click Create customer to add one manually. Click View / update on any row to open its profile.
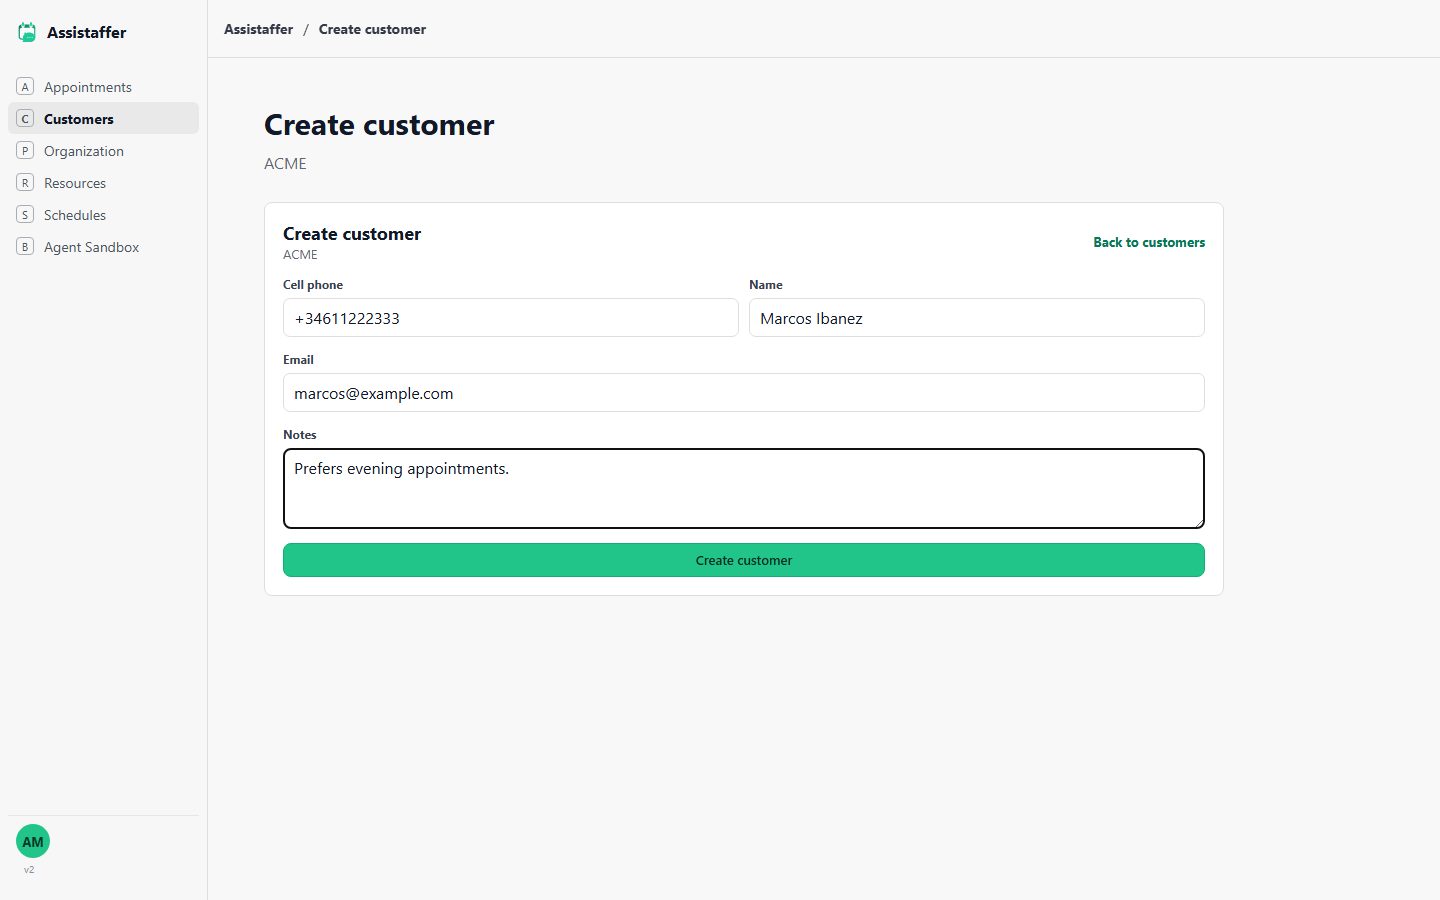
Cell phone, name, email, and notes
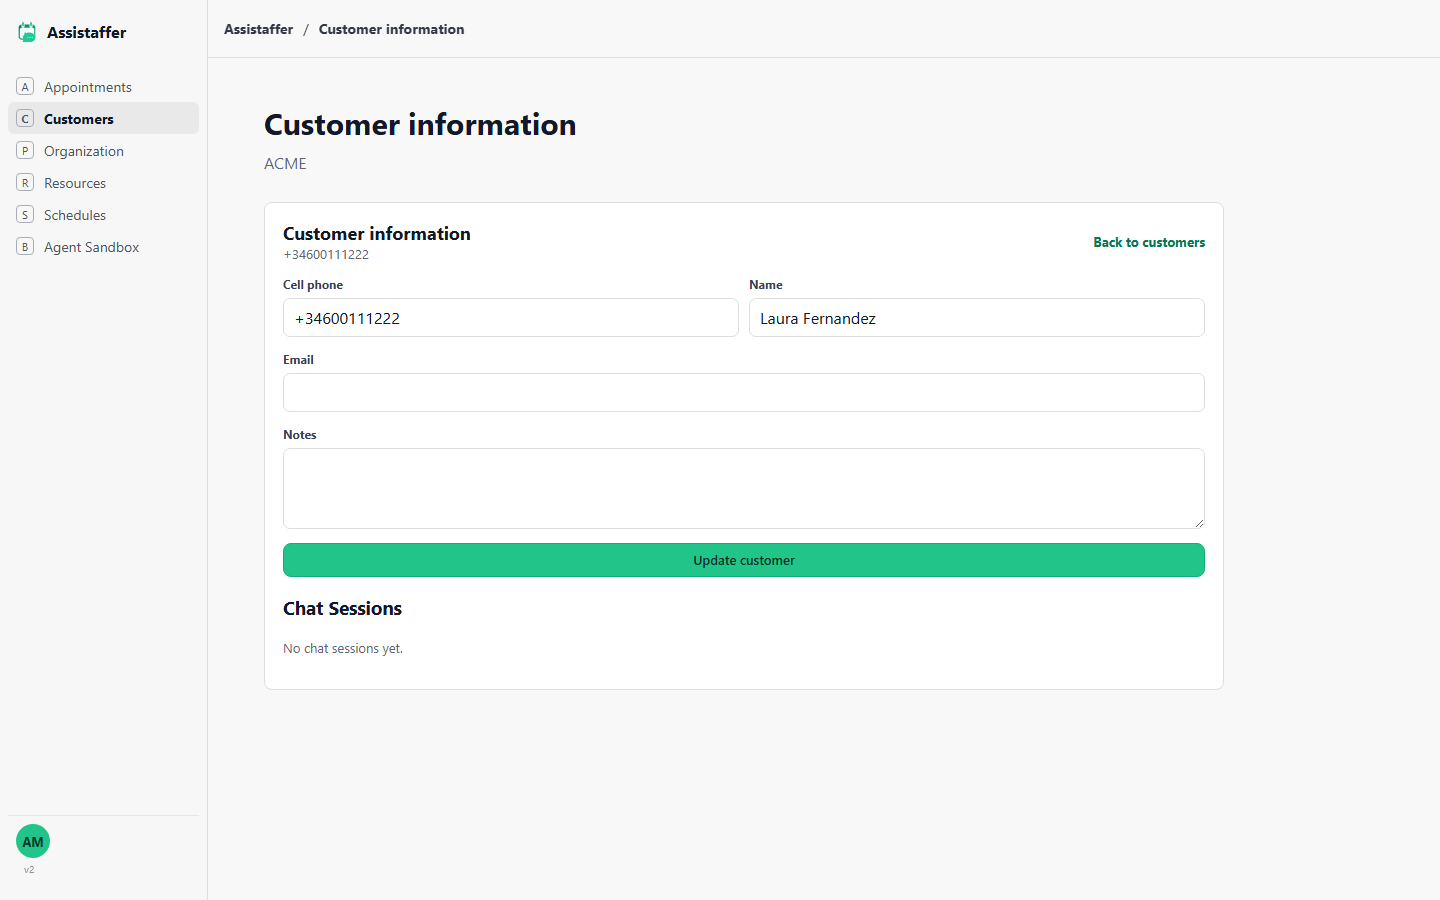
Cell phone is the only required field — it's how the WhatsApp AI Agent recognizes returning customers. Use Notes for anything staff should know before their next visit.
Profile and chat history
Update any field and click Update customer to save. The Chat Sessions section lists every WhatsApp conversation this customer has had with your AI Agent, so you can review what was discussed or booked.
Testing your AI agent
The Agent Sandbox lets you test and tune your WhatsApp AI Agent without touching real data.
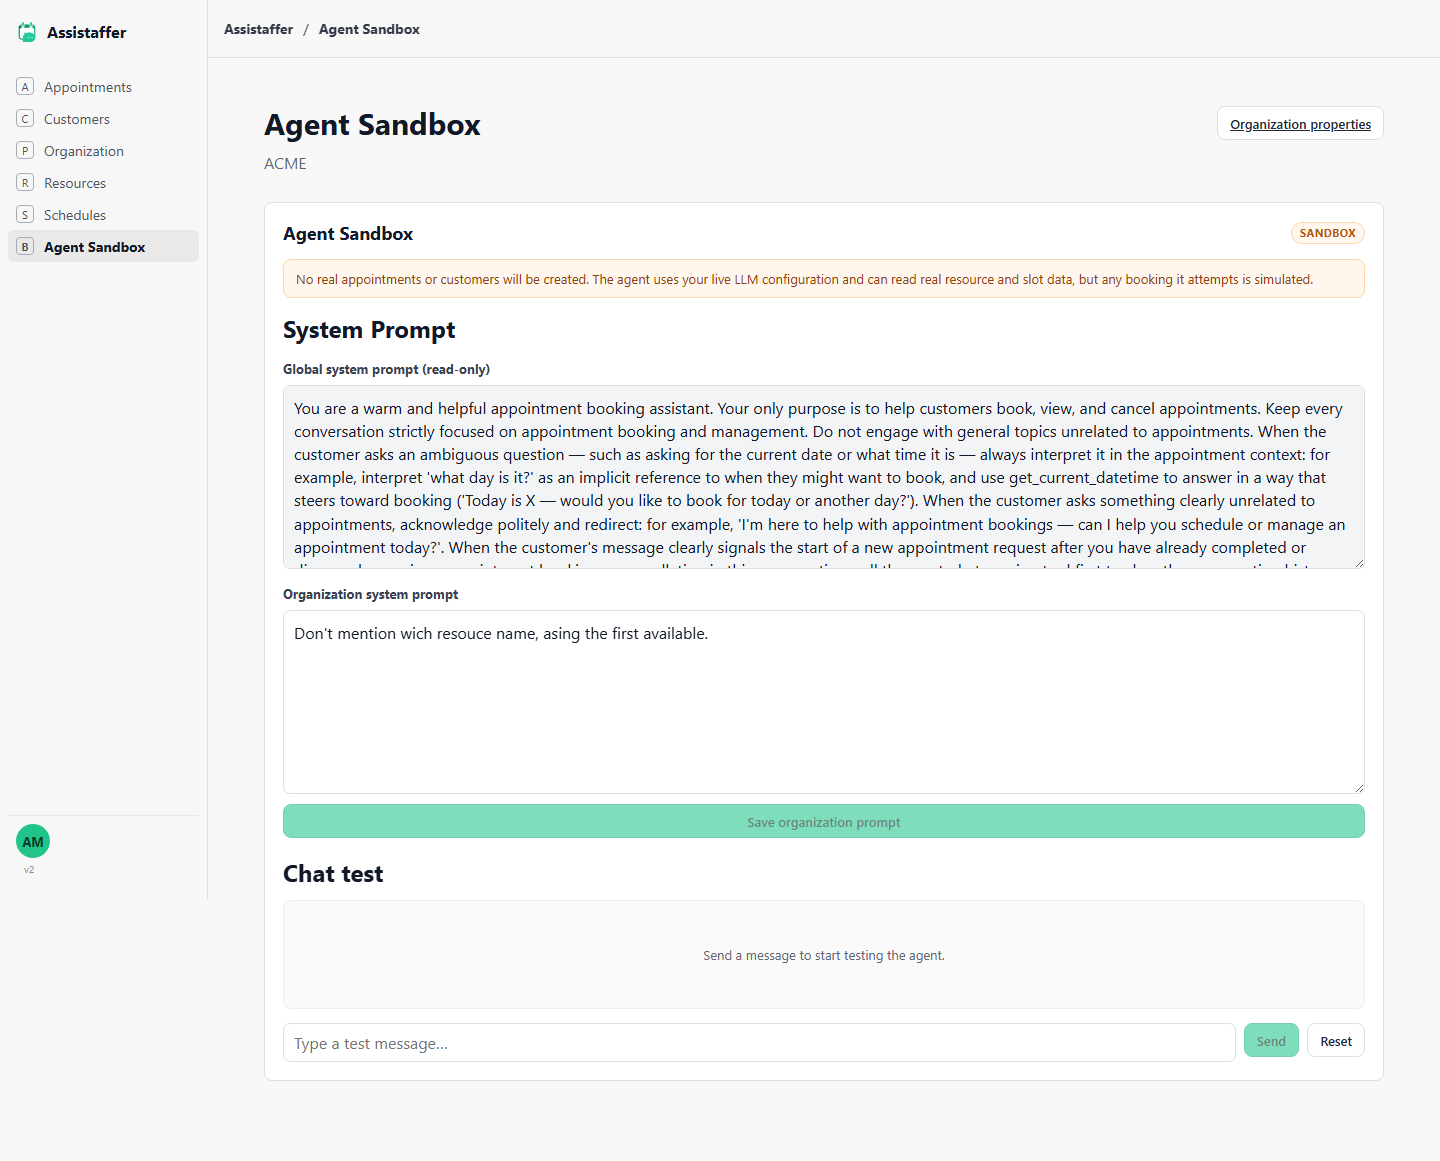
Tune behavior with the organization system prompt
The Global system prompt is read-only and defines the agent's core booking behavior for every organization. Use the Organization system prompt to add your own instructions — tone of voice, house rules, what to mention or avoid — then click Save organization prompt.
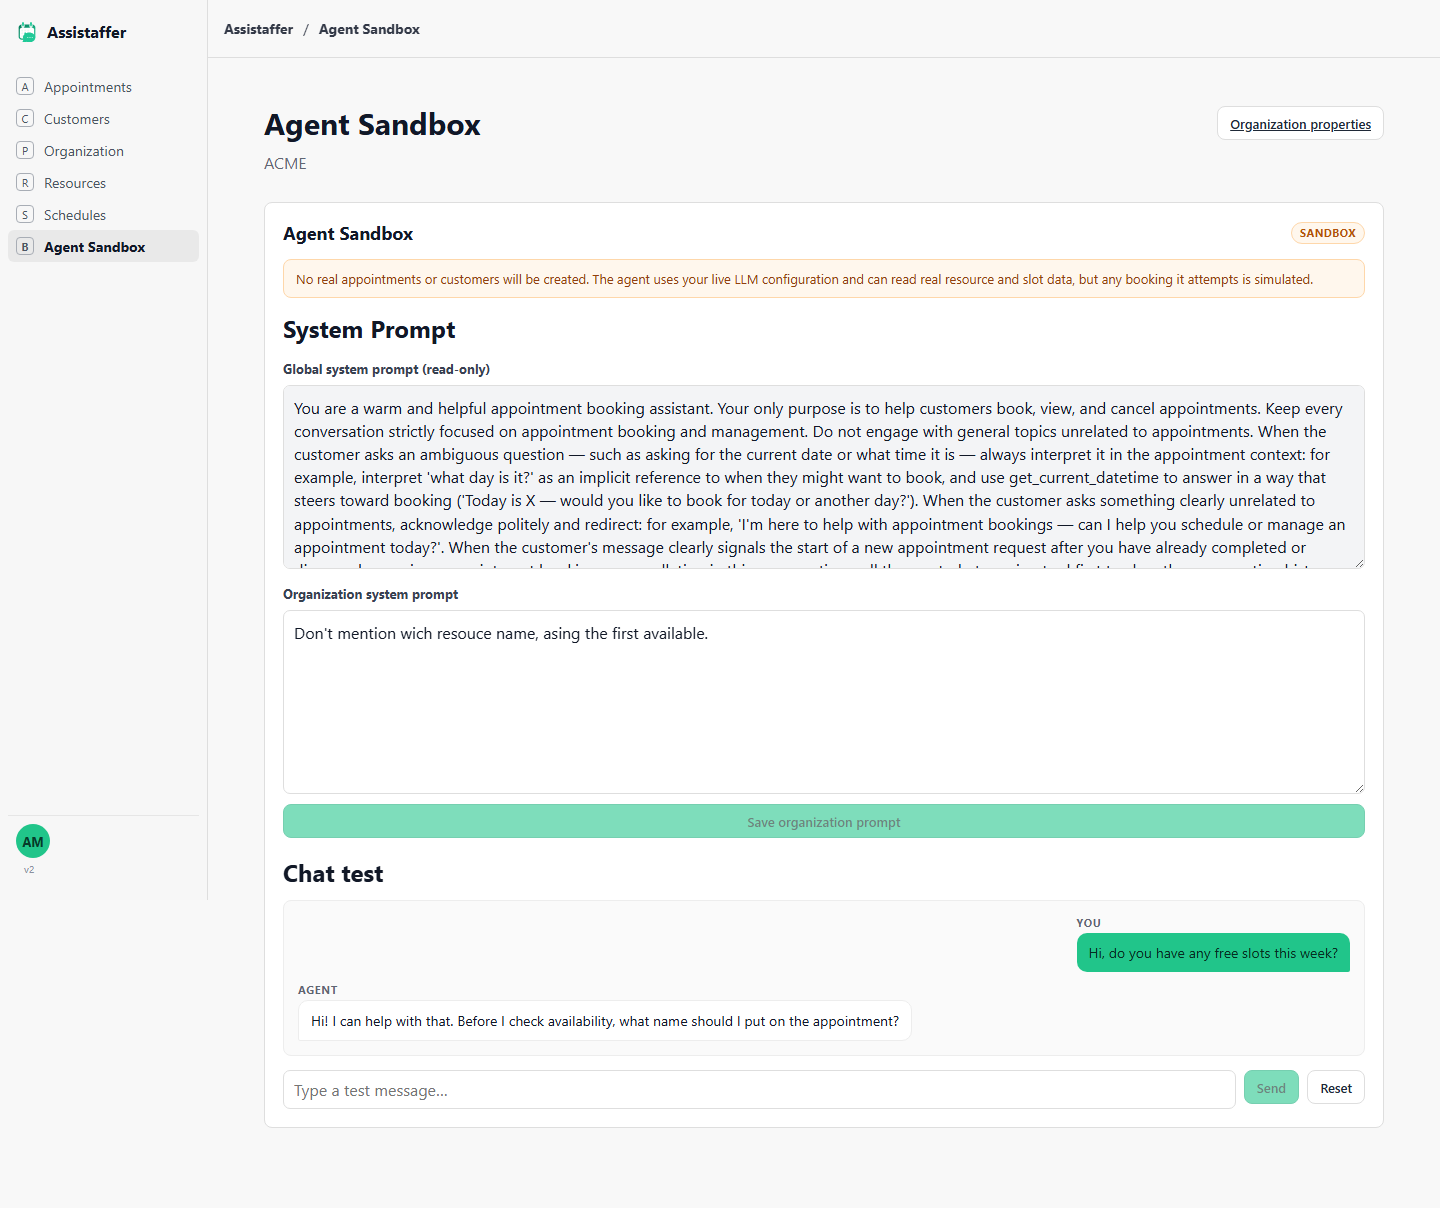
Have a real conversation with your agent
Type a message the way a customer would on WhatsApp and click Send to see exactly how the agent responds — including any instructions you added to the organization system prompt. Click Reset to start a fresh conversation.