On this page
Choose a plan
Compare plans on the pricing page and pick the one that fits your business.
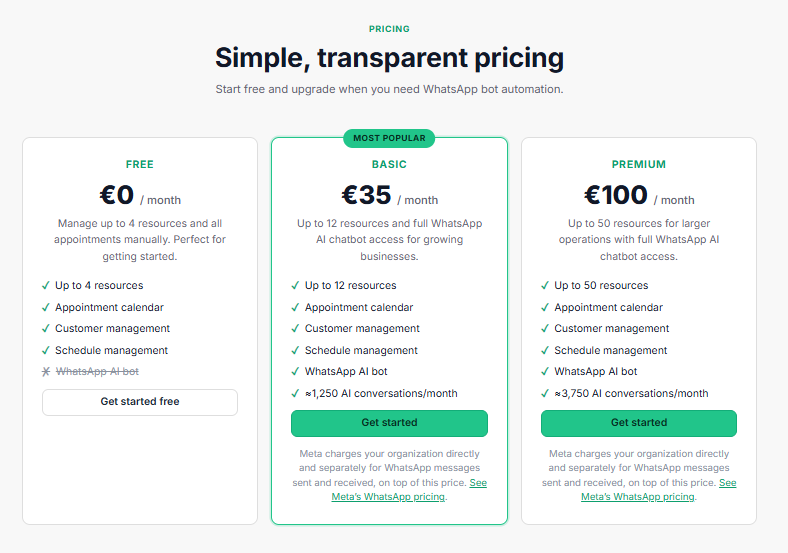
Select a paid plan
Compare the paid plans, Basic and Premium — each with its own resource limit, included AI conversations, and WhatsApp chatbot access — then click Get started on the one you want.
Set up your organization
Three quick screens create the workspace everything else lives in.
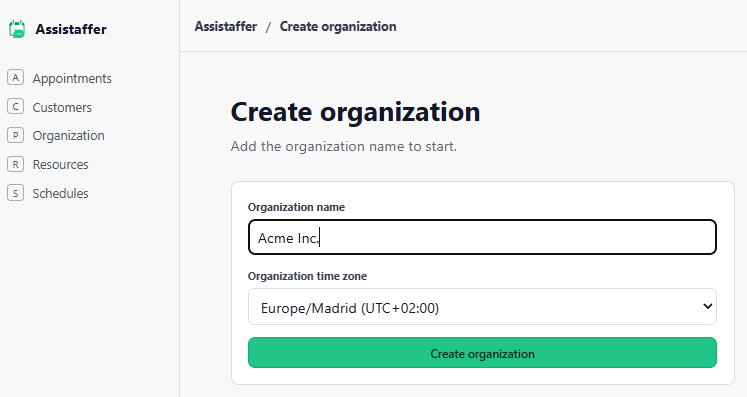
Create your organization
Name your business and pick its time zone. This becomes the workspace that owns your schedules, resources, and customers.
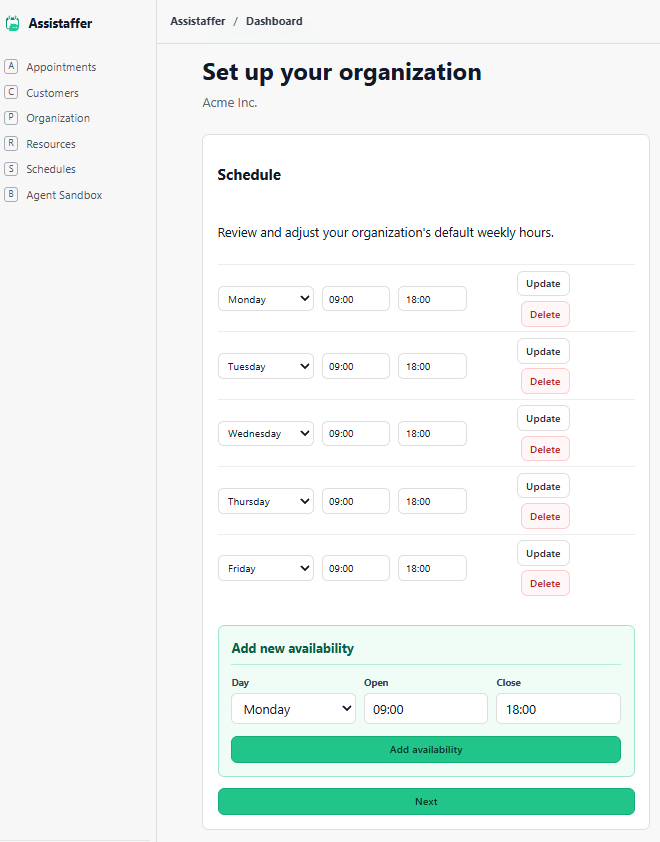
Set your weekly schedule
Review and adjust the default weekly opening hours. You can add, update, or delete availability windows any time later.
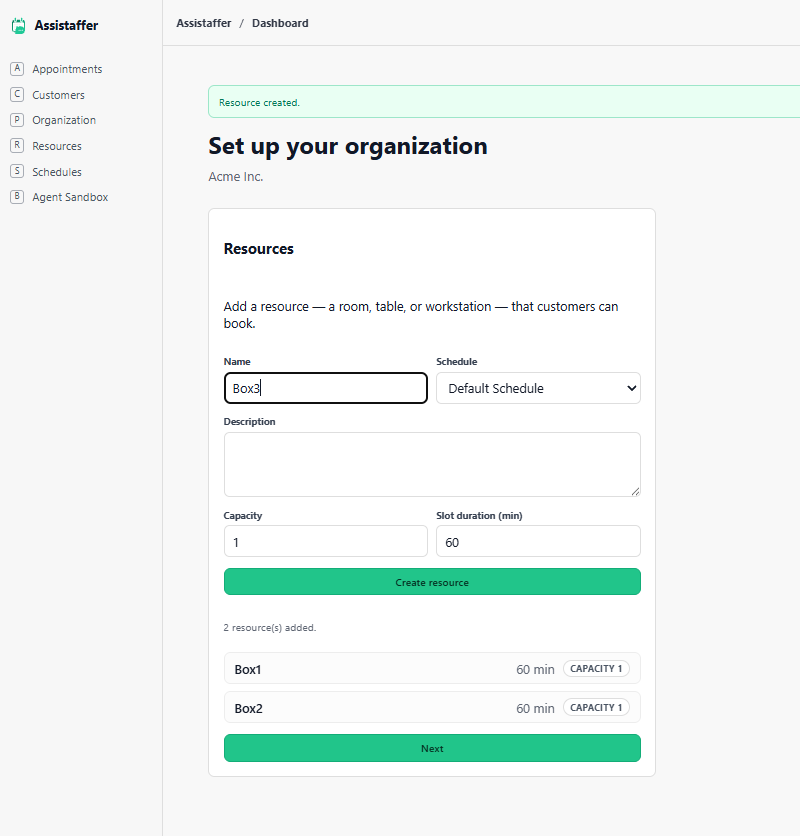
Add your first resources
Add the rooms, tables, or workstations customers can book, each with its own schedule, capacity, and slot duration.
Confirm your plan and pay
Your dashboard confirms the plan you picked, then you complete a secure checkout.
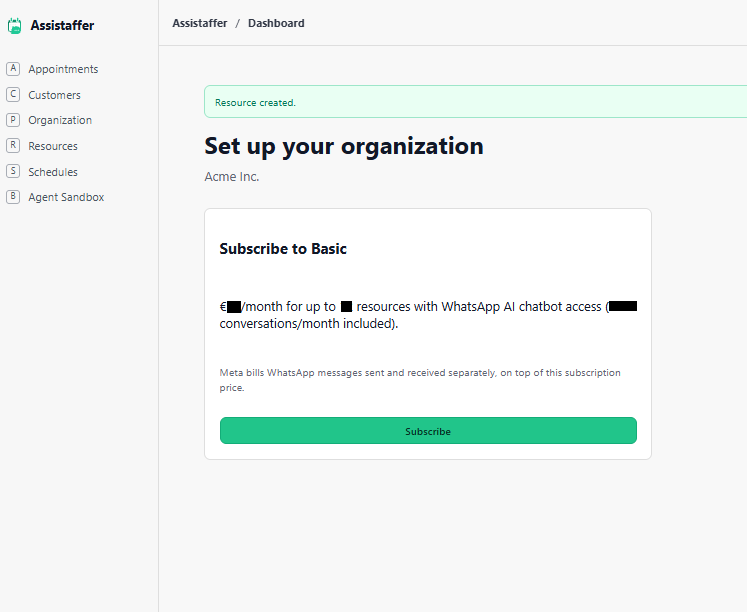
Confirm your subscription
Your dashboard shows the plan you already picked — price, resource limit, and included AI conversations — before you confirm. Meta may also charge your organization separately for WhatsApp messages sent and received. See Meta's WhatsApp pricing.
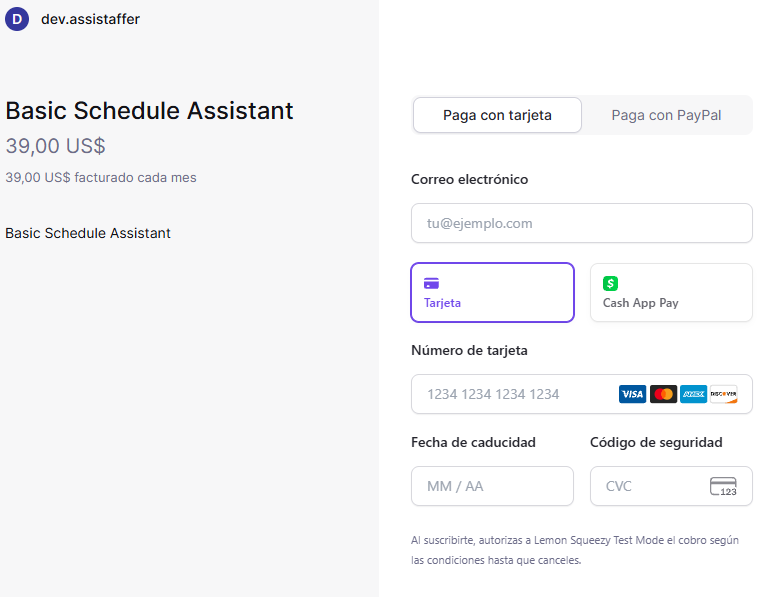
Pay securely
Complete checkout by card or PayPal to activate your subscription.
Connect WhatsApp through Meta
Meta's own guided pop-up handles the technical setup — you just approve it.
Meta concepts, explained
Meta uses its own terminology throughout this part of the process. Here's what each term means.
Meta Business Portfolio
The umbrella Meta account that owns your business's assets — Facebook Pages, ad accounts, and WhatsApp Business Accounts. If your business doesn't have one yet, Meta lets you create one during onboarding.
WhatsApp Business Account (WABA)
A container inside your Meta Business Portfolio that holds one or more WhatsApp phone numbers and message templates. Each Assistaffer organization connects to exactly one WhatsApp Business Account.
Phone Number & Phone Number ID
The Phone Number is the number your customers message. The Phone Number ID is a separate numeric identifier Meta assigns to that number — Assistaffer uses this ID, not the number itself, to send and receive messages through Meta's API.
Meta Onboarding (Embedded Signup)
Meta's official guided flow for connecting a WhatsApp number to a Tech Provider like Assistaffer. It opens as a secure pop-up window where you log in with Facebook and approve only the specific permissions Assistaffer is requesting.
Coexistence
If your number is already active in the WhatsApp Business App on your phone, Meta offers to link it to Assistaffer instead of requiring a new number. Your number keeps working in the WhatsApp Business App while Assistaffer also sends and receives messages through it.
Meta Access Token
The credential Meta issues to Assistaffer once you approve the connection. It's what lets Assistaffer send and receive messages on your behalf. It's stored securely and never shown again after the connection completes.
Meta Messaging Charges
Meta's own per-conversation fees for sending and receiving WhatsApp messages, billed directly to your business by Meta. These charges are entirely separate from, and in addition to, your Assistaffer subscription.
Webhook (already configured)
The mechanism Meta uses to deliver incoming messages to Assistaffer in real time. Because Assistaffer is a registered Tech Provider, this is already set up platform-wide — you don't need to configure or verify anything in Meta yourself.
Now, here's what you'll actually see, step by step:
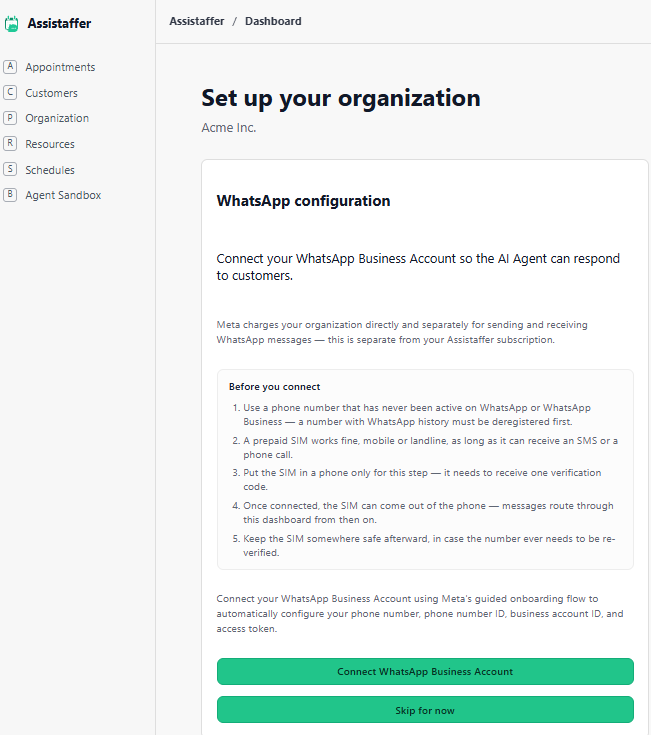
Get ready to connect
Read the checklist: use a phone number that's never been active on WhatsApp — a prepaid SIM works fine, and it only needs to sit in a phone long enough to receive one verification code. Keep the SIM card somewhere safe afterward, in case you need it again.
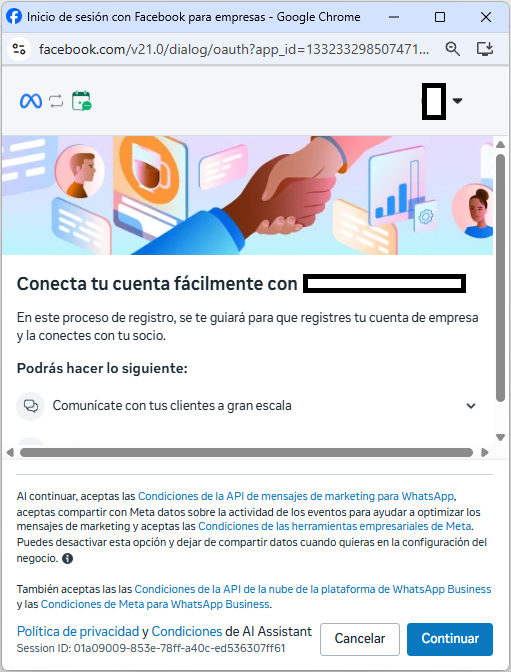
Start Meta's guided connection
A secure pop-up opens Meta's own onboarding flow, which links your WhatsApp Business Account to Assistaffer.
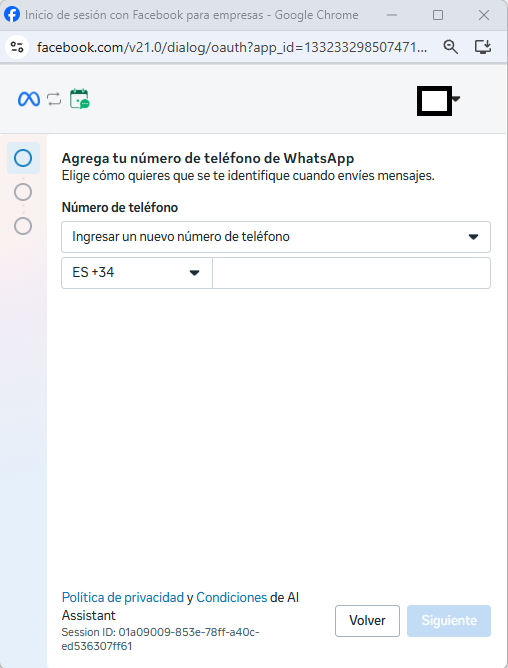
Add your WhatsApp number
Enter the phone number your customers will message.
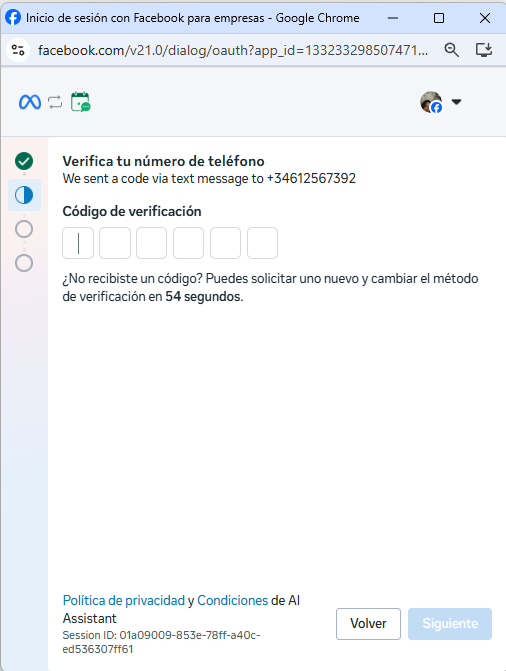
Verify by SMS code
Meta texts a one-time code to that number to confirm you control it.
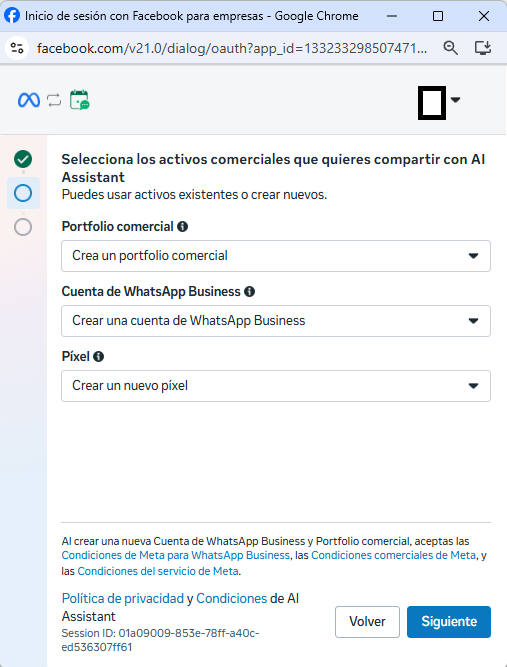
Create your Meta business assets
Select or create the Business Portfolio and WhatsApp Business Account to share with Assistaffer.
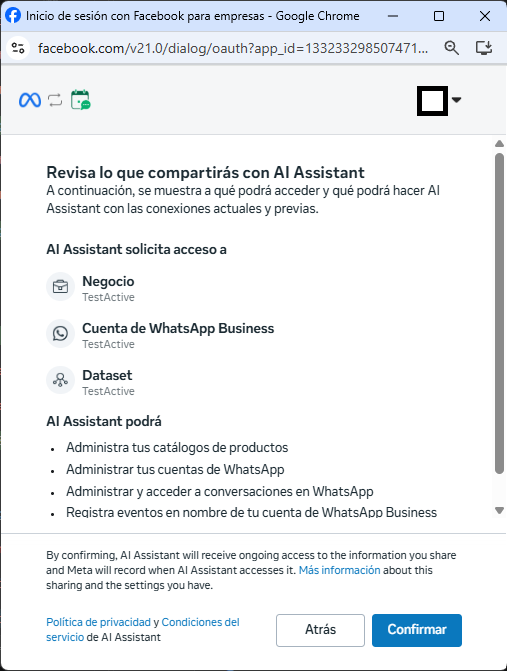
Review and confirm access
Meta shows exactly what Assistaffer will be able to do — manage your WhatsApp account and conversations — before you confirm.
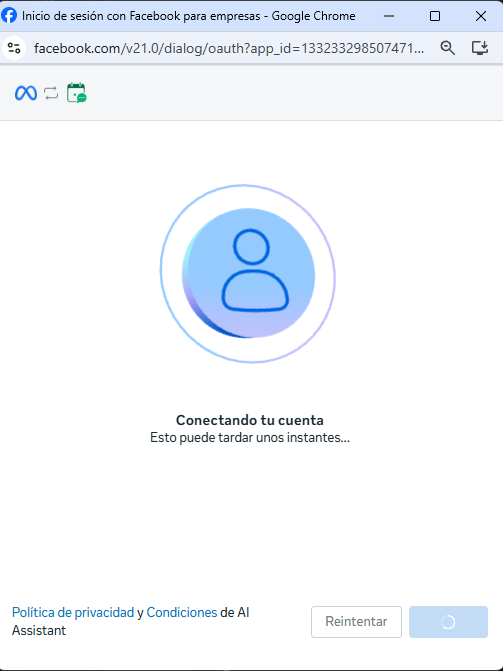
Meta connects your account
A short loading screen while Meta finalizes the link.
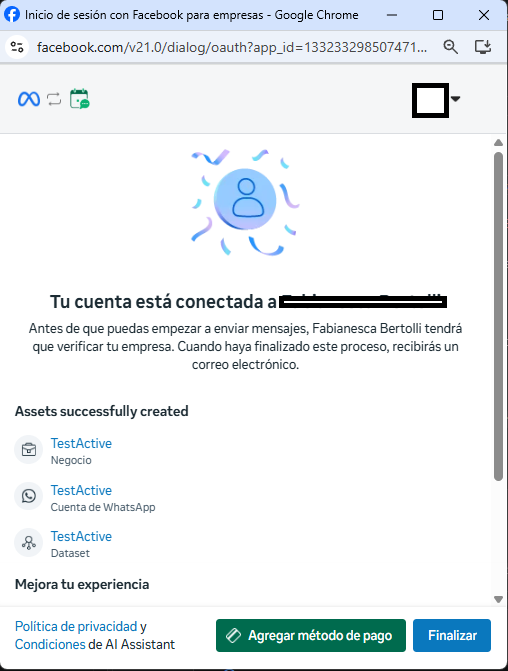
Account connected
Meta confirms the connection and lists the assets it created. Your number still needs to be verified by Meta before you can send messages.
You're ready to go
Assistaffer saves everything automatically — no copying or pasting.
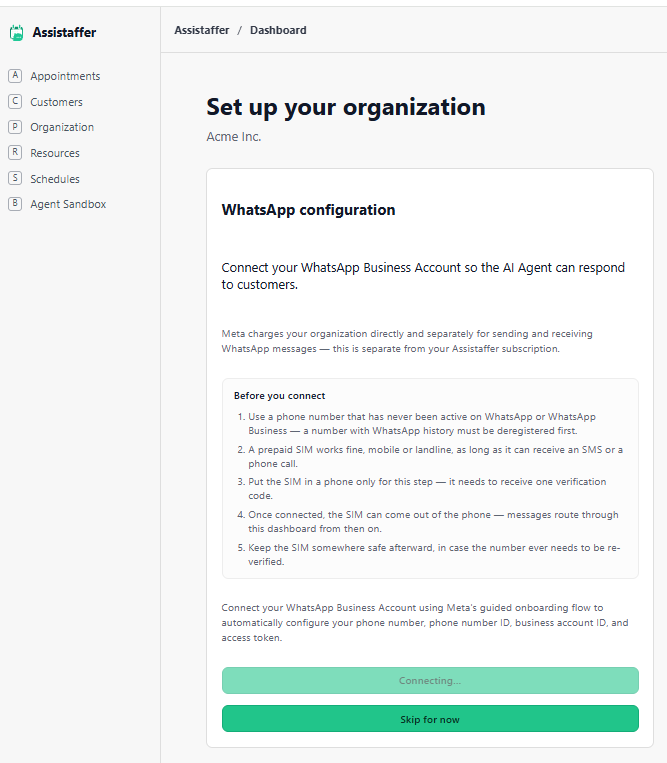
Assistaffer saves the connection
Back in the dashboard, Assistaffer automatically stores your WhatsApp phone number, phone number ID, business account ID, and access token.
Once connected — or skipped for now and configured later from organization Settings — your organization is live: appointments, customers, and the WhatsApp AI Agent are ready to use. Share the WhatsApp number with your clients so they can start booking appointments.
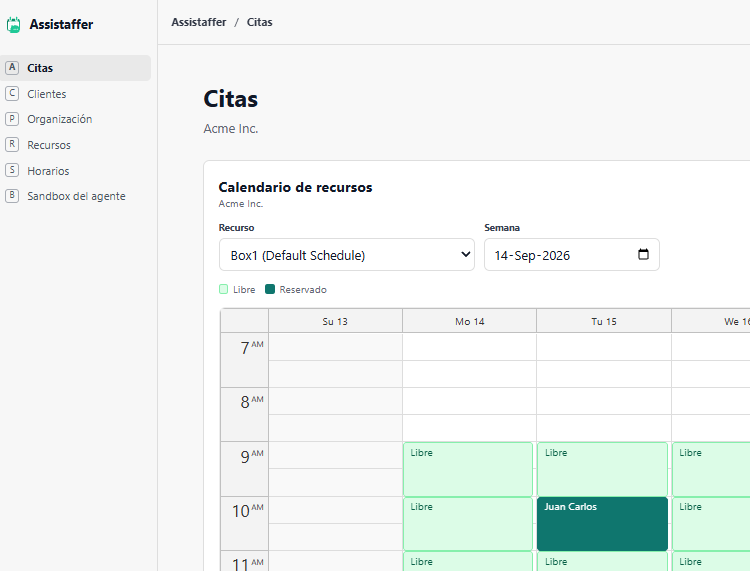
Watch the bot manage appointments
When a customer books through WhatsApp, the AI Agent finds an open slot and adds it straight to the resource calendar — no manual entry needed. You can see every booking under Appointments at any time.